Sonntag, 20. Juli 2008

Vanilla Ice Cream

IMG_7012


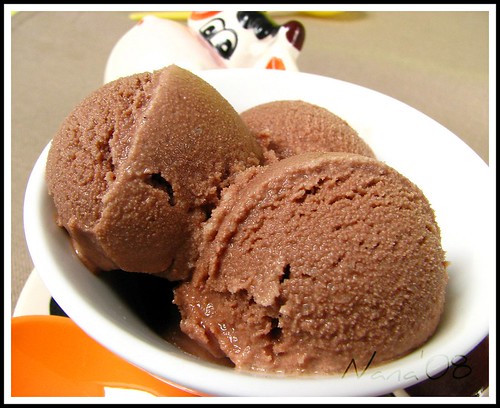
Yayyy!! everyday is ice cream day for us (esp. my hubby). Since my hubby is the biggest fan of vanilla flavour, I have to make 2 different ice cream flavours at the same day. Well...vanilla is a must for him. So, I tried my best to make different kind of vanilla ice cream. Then I found this recipe here, and it turned out so well and tasted like vanilla ice cream from our fave supermarket.

This one is so soft, creamy and egless (most of the vanilla ice recipes I've tried required eggs) and my hubby said this is the best home made vanilla ice & tasted better as the one from supermarket ^_^. So, it's really a keeper!

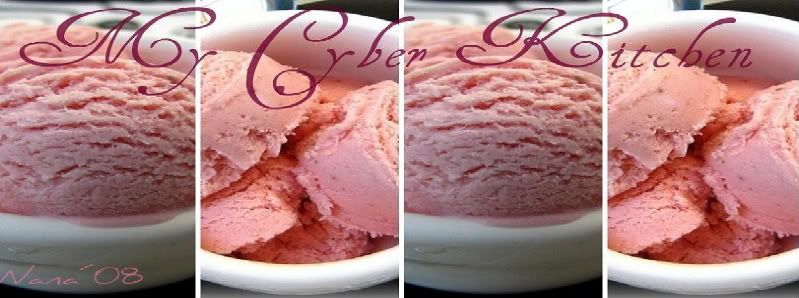
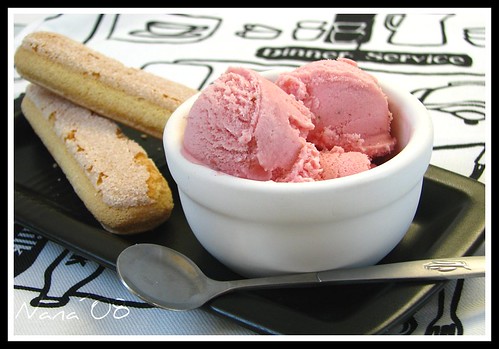
I made a bit change from the original recipe as I only have strawberry jam in my fridge, so I ommited the peach with the jam. And the taste is soo fresh & delicious!
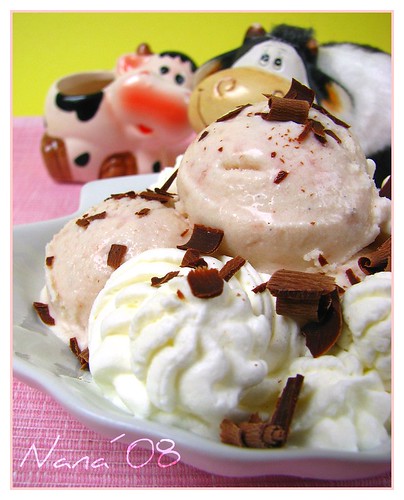
I divided the batch into 2, one is pure vanilla flavour and the other one is with strawberry jam (just in case my hubby doesn't like it). Actually, I want to make the swirl effect on my ice but it didn't work that well *sighs* and the jam made the color look weird :-(.

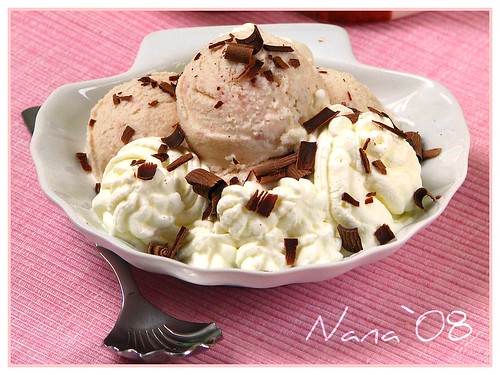
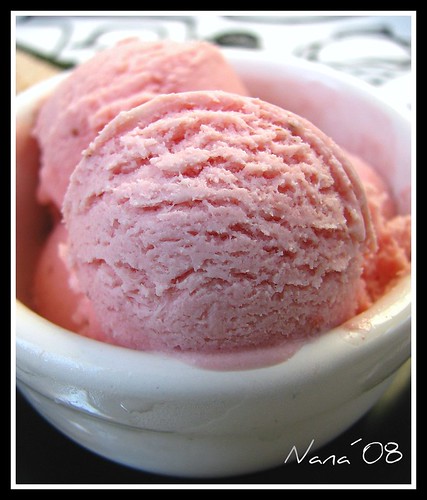
Today is quite hot here, and the ice melt so fast (as you can see at the 2nd picture) and I had to hurry myself taking the shots of my ice cream *pheww* and at the end of the photo session, my husband took the ice and enjoyed it til the last spoon *LOL*


Ingredients:
2 cups half-and-half (I used light cream / kaffeesahne in germany)
1 cup whipping cream
1 cup minus 2 tablespoons sugar
2 tablespoons peach preserves (I substituted it with strawberry jam)
1 vanilla bean, split and scraped

IMG_7019


Directions:

Combine all ingredients (including the bean and its pulp) in a large saucepan and place over medium heat. Stirring occasionally and bring it into simmer or until you see bubble hit the surface.DO NOT LET IT BOIL!

Remove from heat and allow to cool slightly. Remove the hull of the vanilla bean, pour mixture into lidded container and refrigerate mixture overnight to mellow flavors and texture. (I refrigerated for about 5 hours only)

Prepare your ice cream maker and freeze the mixture inside until it reaches the soft consistency and the volume increase by 1/2 or 3/4 times. The remove the mixture into ice container and let it hard for about 1 hour.

Read More...

Freitag, 18. Juli 2008

Cacao Ice Cream

IMG_6991


Ow ow..someone is in ice cream fever now!!! Yup yup..I am!. I can't help it since it's not so complicated to make this delicious dessert. The other reason is that my hubby is the ice cream monster at home. He's really addicted to ice cream & not a day goes by without ice cream ^_^. So...you can tell that ice cream a must in our freezer. I found this recipe here, it's very simple and it's egless, that's what I like. The taste is great, but from the consistence I like my strawberry ice cream better, it's so creamy & softer compares to this one. I substituted some ingredients here based on what I have in my kitchen *im too lazy too go out today as the weather isn't that nice*, maybe that's the reason why the consistence isn't creamy as the other one. I guess I will try again next time with the right ingredients :-)
Here is the recipe:

Ingredients:( for 5 servings)

1/4 (14 ounce) can sweetened condensed milk
7 g Cocoa Powder
130 ml heavy cream(I used milk+butter)
65 ml light cream
4 ml vanilla extract

IMG_6997


Directions:

1. Prepare a saucepan, then mix condensed milk and cacao powder. Cook over low heat, stirring constantly until mixture smooth & slighly thickened. Remove it from heat & let it cool.

2. Gradually add heavy cream, light cream & vanilla extract into the mixture. Then whisk until well blended. Refrigerate until cool

3. Prepare your ice cream maker, then add the mixture gradually and let it stand for 15-30 minutes or until u get the desired consistence.


Read More...

Mittwoch, 16. Juli 2008

Home Made Strawberry Ice Cream

IMG_6950


It's been very hot here lately and this home made ice cream is a perfect cooler!! It's easy to made & I guarantee that u won't have so much mess in your kitchen..hehe. U can also make this with or without ice cream maker.


What you need:
100-150 gr Strawberries (Fresh/Frozen)
50-70 gr icing sugar
150 gr plain yoghurt
200 gr whipped cream
1 tbsp lemon juice


IMG_6956


Method:
- mixed strawberries with 1/2 of icing sugar, lemon juice & yoghurt. Then bring them into Purée using a hand blender or blender. Set aside
- Add the rest of icing sugar into whipped cream then beat until it reaches the soft peak, then add the strawberries mixture gradually then stir it until well blended.
- Put the mixture in refrigerator for 15 minutes and let it cool, then put in the ice cream maker for 15-30 minutes until you get your desired consistence. Then remove it into a cool box then put in a freezer until the time you serve it.
- If you don't use an ice cream maker, after the mixing process u can just put it directly into the freezer and let it stand for 6-7 hours

Read More...

Sonntag, 15. Juni 2008

Mocca Chiffon Cake

My creation


Yippeeee!!!!!!! finally.... I did it!! I baked a chiffon cake. This is the 2nd trial after I ruined the 1st one. I was so impatient to remove the cake from the mold when it was still hot and it was such a nice "freefall" for the cake. That's what I got when I disobey the rules..hehe. But today, i finally got what i want..yuhuuu!!! I never thought that it was easy to make this cake and unmold it. What irritated me a bit was the amount of the eggs *eww...7 eggs...that's a bit too much*, but i never regret it at all after the 1st bite. So moist and once you started it..u will never be able to stop *it's happening to me & my husband* hihi. As you can see on the pictures..the texture is quite nice and the cake is quite tall (it's not shrink at all). No hesitation anymore to make the 3rd one *wink*.
I got the recipe from a friend on Multiply, mbak Nining...thanks for sharing the recipe & the secret of how to make it. This one is really a keeper :-)

Ingredients I:
5 egg yolks
150 gr sugar
1 teaspoon baking powder
1/2 teaspoon baking soda
200 gr flour
125 ml milk/water/coconut milk (I used water)
100 ml cooking oil
5 drops mocca paste

Ingredients II:
7 egg whites
100 gr sugar
1/2 teaspoon cream of tartar ( I used vinegar as the substitution)

Method:

- preheated oven at 170°C
- mix egg whites with cream of tartar and then beat until fluffy, add sugar gradually (made it 2x), then continue beating using highest speed until it the soft peak is reached, set aside
- mix sugar, baking powder, baking soda & flour then make a hole in the middle, add egg yolks & cooking oil in the hole
- stir slowyly using balloon whisk & add milk gradually, continue stirring until dissolved.
- Fold egg whites into the egg yolks mixture in 3 steps, stir slowly until it well blended.
- Place the dough into chiffon cake mould, then bake for about 50 minutes
- After 50 minutes, increase the oven temperature into 180°C and continue baking for about 10-15 minutes.
- remove the cake from the oven then let it cool ( flip the cake mould downwards during the cooling process)

Read More...

Dienstag, 27. Mai 2008

Ayam Betutu (Roast Chicken in Banana Leaf)

ayam betutu


This ayam betutu is my husband fave food (mine too). After the long vacation, I finally go back to my kitchen. Yep..it's time to cook again. Ayam betutu comes originally from Bali. Actually, the original recipe required duck as the main ingredient, but we can also substitute it with chicken. This great spicy & tasty food will taste so much better when u wrap it with banana leaf *sighs..i miss the fragrance of those banana leaves*
Since it's quite difficult to find banana leaves here, i decided to wrap it using aluminium foil, the taste isn't that perfect as the original one, but still it tasted great. Thanks to my friend Pepy for sharing the recipe.
I never thought that it's so easy to cook this ayam betutu, what u need is the patience of waiting..hehe. :-)
As a shortcut, I used my pressure cooker for the steaming procces :-)

Ingredients:
A:
1 whole chicken (ca.1,3 kg)
Fresh juice from lime or lemon

B:
8 shallots, peeled
4 cloves garlics, peeled
2 stalks lemon grass, finely sliced
4-5 fragrant lime leaves
5 candle nuts
2,5 cm ginger
1 teaspoon turmeric powder
1 teaspoon kencur (lesser galangal) powder
5 bird's eye chilli
1 teaspoon shrimp paste
1 tablespoon corriander seeds
1,5 tablespoon olive oil
1 tablespoon sugar
salt as you desired
aluminium foil for wrapping

Method:
- wash the chicken then wipe it dry, set aside. Pour lime/lemon juice all over the chicken.
- Mixed all B ingredients and chopped it well using food processor
- Rub the chicken outside with the mixture and then fill the center or the chicken with the remainder or vice versa.
- close the open chicken with skewer, then wrap it with alumunium foil.
- Let it stand for minimum 2 hours (the longer the better..I marinate it for about 2 days)
- prepare your pressure cooker, then steam the chicken for about 30-45 minutes (I use high pressure), let it cool.
- Bake chicken in a preheated oven at 175°C for about 15 minutes.
- serve with warm rice

Read More...

Donnerstag, 27. März 2008

Baked Potato


I got some left over of tomato sauce & I didn't want to get rid of it. So,thought about doing something with the left over. And it turned out so good :-)

Ingredients:
300 gr plain yoghurt
4 eggs
4 big potatoes, steamed. Put it aside and let it cool for about 4 hours then peeled & grated.
Left over of tomato sauce
100 gr gouda cheese (grated)
salt & pepper
italian herbst(optional)
a bit nutmeg

Directions:
- preheated oven in 180°
- Mix eggs, salt, pepper, nutmeg & italian herbst, then beat it well.
- add yoghurt the stir until well blended
- Pour the yoghurt mixture on grated potatoes, then stir it.
- add tomato sauce in the mixture and stir it slowly
- prepare baking pan or molds & grease with butter/cooking oil, sprinkle a bit cheese on it then pour the potato mixture, cover the top with cheese.
- bake in preheated oven for about 45 mins.

Read More...

Banana Yoghurt Pudding


Frankly speaking...I hate banana..LOL! The reason why I made this pudding was for my contribution in a monthly food event. Since I don't eat banana, my hubby is the victim for my trial ^_^. Thank God he doesnt' have any problem eating banana. he said it was delicious & really moist.

Ingredients:
350 gr plain yoghurt
200 gr whipped cream
7 gr vanilli sugar
3 tablespoon sugar / as you desired
85 gr banana gelatine
1 cup evaporated milk
2-3 bananas, cut in slices
7 gr agar-agar or jelly

Directions:
- In a pan, mix sugar, vanilli sugar, condensed milk and cook until it simmer then set aside
- add the gelatine into the milk mixture, then stir it well
- beat whipped cream then mixed with yoghurt, add 3/4 of banana slices
- then pour the gelatine-milk mixture into yoghurt mixture, stir well & slowly, set aside
- cook agar-agar / jelly based on the package instruction
- Prepare some glasses or molds, arange banana slices on the bottom then pour agar2 on it slowly using tablespoon (2-3 tablespoon), let it a little bit firm then pour yoghurt on it.
- keep in the frigde and let them firm until the serving time

Read More...

Mini Tortellets


The weather isn't friendly lately & makes me lazy to go out. So, I decided to make this mini tortellets a few days ago. Very easy to make & mixer wasn't needed at all. Just mixed everything and then baked. Voila!

Ingredients:
175 gr all purpose flour
80 gr butter, cut in cubes
20 gr sugar
1- 2 tablespoon water

For the filling:
100 gr cream cheese
25 gr sugar
50 gr dark cooking chocolate, melted
1 egg

Directions:
1. Mix butter & flour then knead with hands until it crumbles. Then add sugar, keep continue kneading until well blended then add water. Knead until the dough becomes soft & not sticky. Place the dough in a bowl then cover with plastic wrap, keep in the fridge for about 15 mins.

2. Meanwhile, mix sugar & cream cheese then stir with spoon. Add egg on it , keep stiring until everything is well blended. Pour the melted chocolate on it, then stir it once again.

3. Preheat oven into 175°C

4. Take the dough from the fridge out, then roll it out. Cut the dough in small pieces (based on the mold diameter), then put it on the mold. Stick the base using fork then pour the filling on it.

5. Bake in the oven for about 20-25 minutes.


Read More...